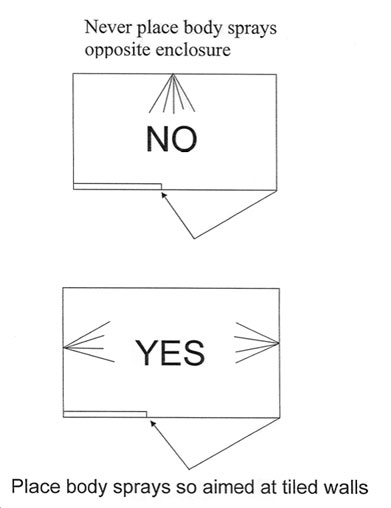
Properly designed and constructed openings will result in Shower Doors that not only look beautiful, but are also leak resistant. Today’s master bath shower often involves a combination of a powerful shower heads and multiple body sprays that makes for a spa experience. These same features often cause a very high volume of water spray and proper planning and design is critical to creating a beautiful and functional shower door.
Design Guidelines
Accent Tiles (boarders) - if boarder is raised off of the flat plane of the wall, it will need to be cut. A cut of 3/8” will provide the fixed panel with a custom fit; a cut on the hinge side of the door will be roughly 1”. The more the boarder stands off the wall the wider the cut will need to be, in order for the hinge side of the door to swing.
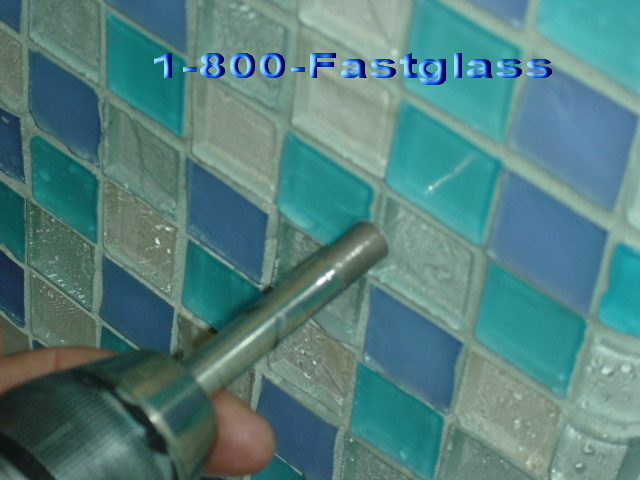
Glass Tiles - installation of a frameless shower is possible even with glass tiles involved. A special bit is needed to drill through the glass tile, but sometimes they crack; so try to avoid glass tiles on the walls where the shower enclosure will be touching.
Shower Head Placement - try to avoid installing the shower head so it points directly at a swinging door.
Niches - niches should not be placed in direct line where the shower door/enclosure will set. All niches should have a pitch on its sill.
Soap dishes - need to be pitched in order to drain. Some manufactured soap dishes already have a pitch on them, in this case, install them plumb and level.
Studs (Wood 2x4) - glass doors weigh between 66-100+ pounds, so it is our recommendation that a stud is provided to hang the door. For the best support, install vertical areas directly in line where the glass will set.
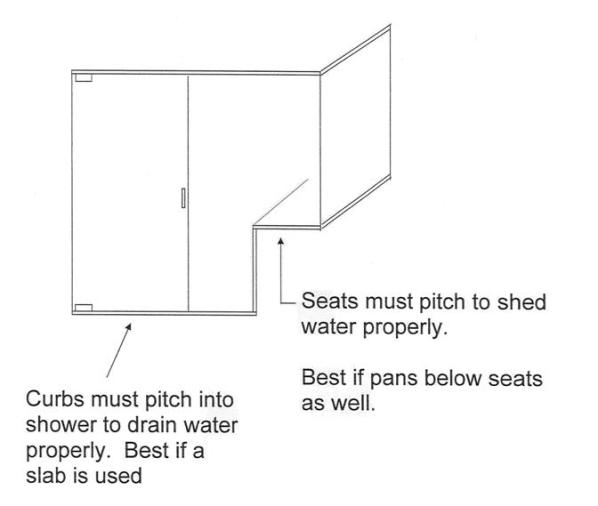
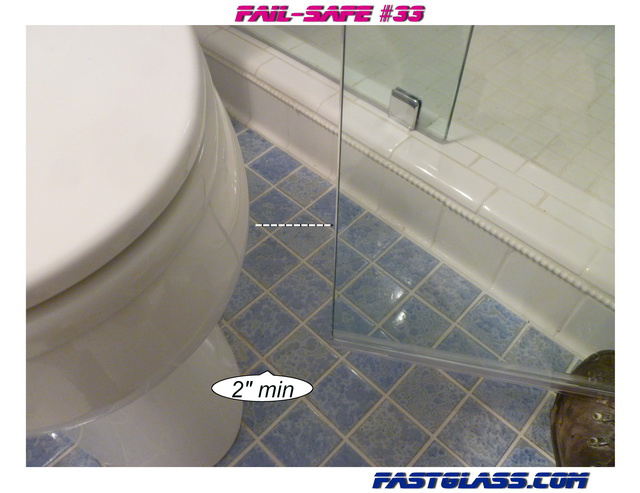
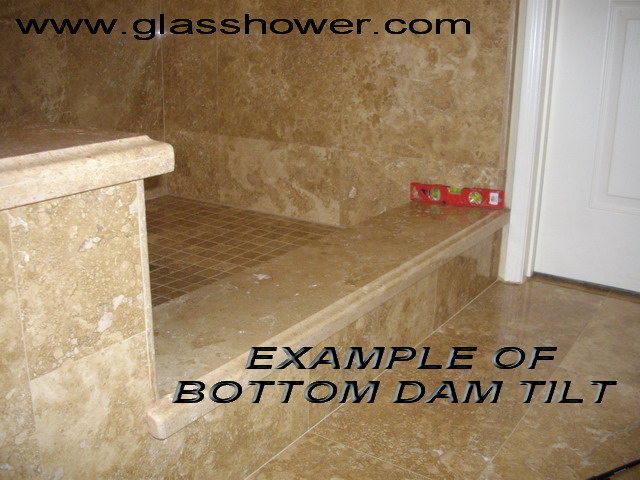
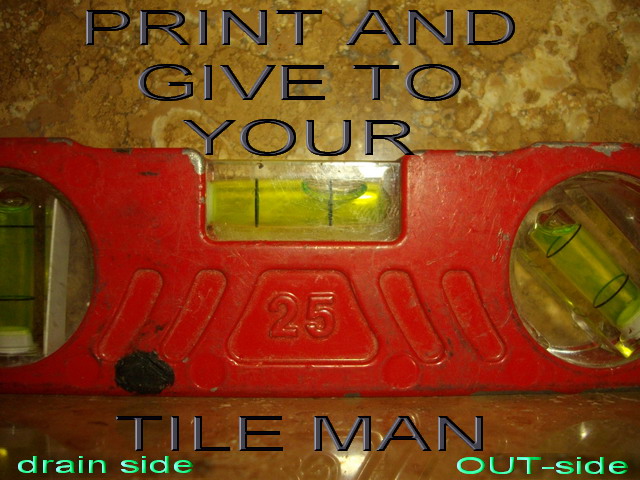
Pitch (Incline Gradient, or Slope) - all horizontal planes involved in the wet area of a bathroom need to be pitched. We recommend a 1/8”-3/16” pitch for every 6” of horizontal surface. (See Sketches)
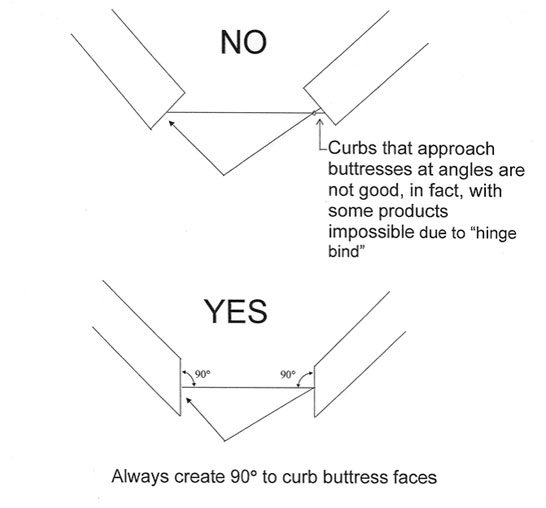
Curb - the small rise we step over to enter the shower. The curb needs to be pitched toward the drain, but otherwise level (long ways).
Plumb - definition: something that is “level” on a vertical plane. Make sure all vertical planes are as plumb as possible; walls, knee walls, tub decks, etc. (See Sketches)
Shower Seats (or tub decks involved in the shower area)- need to be pitched toward the drain.
design configurations
Door (Swinging Door) - hung off of a wall, this is the most common installation method.
Door & Panel - this is the second most common method. There is one fixed glass panel installed in line with one swinging door.
Slider - Two glass panels that slide past each other. This application is used in areas where there might not be enough room for a swinging door.
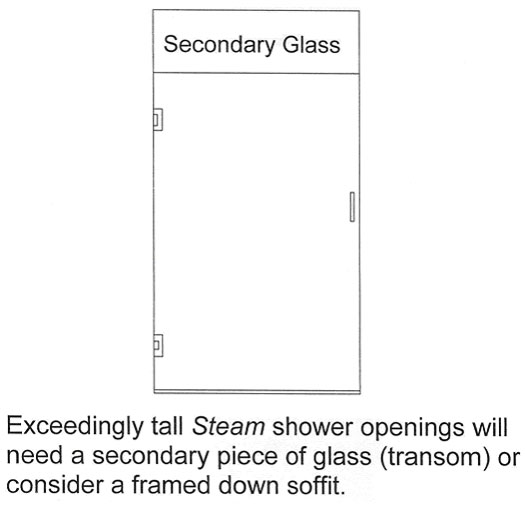
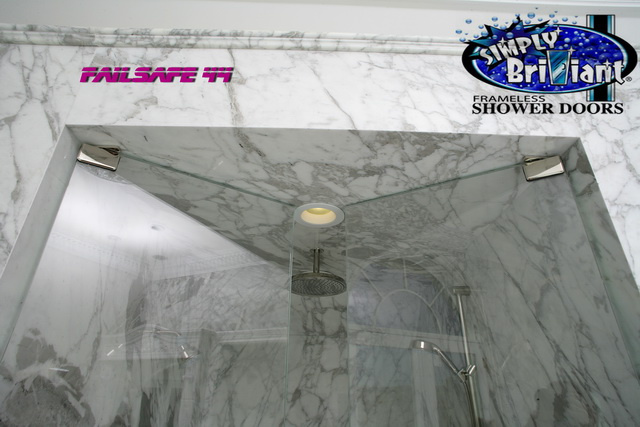
Full Height Enclosures (Steam Enclosures) - most enclosures don't rise all the way to the ceiling, but steam enclosures do. If we fully glass enclose the wet area it will make your bath very steamy. A pivoting transom (window) can be added to a steam enclosure to allow the steam to escape.
Neo-Angles - this is a 135 degree angle. This is a standard construction angle. It is used when trying to make the most of your bathroom space. (Photo on left)
Installing Glass Doors
Installing Frameless Glass Doors - A door can only be installed using hinges. Basically there are three types of hinges:
Installing glass panels
Installing Frameless Glass Panels - There are 3 methods of attaching frameless, fixed glass panels to the wall in a shower area:
Clips - are the most common method of attaching fixed glass panels to a wall.
U-Channel - this method is used more often when walls are waive (to hide an imperfect wall) in order to keep the cost down.
Silicone System - used in higher end applications and steam showers. The glass is snugly fit into the s
LOOK AT THE BOTTOM OF THIS SHOWER ENCLOSURE. LOOK REAL CLOSE AND YOU CAN SEE THIS FRAMELESS SHOWER DOOR CLIP HAS SILICONE OOZING OUT OF IT. ONE MUST FILL THESE CLIPS BECAUSE IF YOU DON'T LATER YOU WILL SEE WATER POURING OUT OF IT AND MORE CORROSION THAN EXPECTED DOWN THE ROAD. ALSO, JUST TO FULLY DESCRIBE THE PHOTO OF THIS FRAMELESS SHOWER IT HASN'T BEEN FULLY WET-GLAZED YET
frameless showers guys were trained all about frameless shower door hinge installation just as you see here. Imagine you were me. And you were installing four to ten soild brass hinges a day ...... let some time go by and you will learn some trade secrets. I call them my FAILSAFE'
TIGHTEN the ever loving HELL out of it. ONE will need the #3 Phillips head CORDLESS impact driver. Also,see video of a follow up trip where I trim off the excess rubber gasket about 3 months later after installation. You will notice in this video that after I used the single edge razor blade to cut off the excess black rubber gasket that squished out of hinge is that it turned into a glue. the only way that going to happen with you is if your jacked and using a #3 Phillips on this hinge. Using a #2 will most defiantly not be able to over tighten. i find that a lot of the repairs and go backs is due to the installer week ness or lack of proper on propose .
So I Just did a test. i put the hinges on the BLAST to see if they look strong to you. First thing we tested was the over-tightening.. See first test. Perfect example of the wrong size tip. This test was performed on a Simply Brilliant 3/8" Clear tempered panel on the center hinge. We were unable to intentionally over tighten and pop glass. this is a deal breaker people. We as not only a company but a whole industry would be in so much trouble if it was even possible to do this. Could you imagine one of my installers calling and saying he just exploded another one at customers perfectly tile shower door opening??? Since modern machines cut these cutouts i will show you what I mean concerning
VIDEO SPECIFICALLY LOCATED WITHIN THE FAIL SAFE SECTION OF OUR WEBSITE FOR THE PURPOSE OF TELLING THE WORLD IT'S OUR OPINION THAT UNDER TIGHTENING FRAMELESS SHOWER DOOR HINGES WILL RESULT IN GO-BACKS. FIRST WE RECOMMEND A CORDLESS IMPACT DRIVER FOR MAXIMUM RESULTS. THE DRIVER MUST HAVE THE #3 PHILLIPS TIP. I ALSO BLOCKED THE HINGES FULFILLING FASTGLASS FAILSAFE #2. THE 3/8" TEMPERED GLASS SEEN HERE IS SO STRONG. I GET ASKED ALLOT ABOUT THE SAFETY OF THESE TYPE SHOWER ENCLOSURES AND EVEN HAD A NEW HOME OWNER ASK ME TO REMOVE ONE BECAUSE THEY FELT THAT THE GLASS WAS DANGEROUS. SO I EDITED THE VIDEO BACKWARD WITH THE GLASS EXPLODING FIRST AS NOT TO BORE YOU. FINALLY, LETS PRETEND THAT ONE COULD OVER TIGHTEN A 3/8" FRAMELESS GLASS DOOR HINGE. COULD YOU IMAGINE THE STRESS LEVELS EVERY TIME I GOT A CALL FROM ONE OF THE GUYS SAYING WE JUST POPPED ANOTHER ONE IN YOUR PERFECTLY TILE SHOWER STALL??? ITS JUST NOT GOING TO HAPPEN BECAUSE OF OVER TIGHTENING. THIS IS GOOD NEWS
frameless showers guys were trained all about frameless shower door hinge installation just as you see here. Imagine you were me. And you were installing four to ten soild brass hinges a day ...... let some time go by and you will learn some trade secrets. I call them my FAILSAFE'
TIGHTEN the ever loving HELL out of it. ONE will need the #3 Phillips head CORDLESS impact driver. Also,see video of a follow up trip where I trim off the excess rubber gasket about 3 months later after installation. You will notice in this video that after I used the single edge razor blade to cut off the excess black rubber gasket that squished out of hinge is that it turned into a glue. the only way thats going to happen with you is if your jacked and using a #3 Phillips on this hinge. Using a #2 will most defiantly not be able to over tighten. i find that a lot of the repairs and go backs is due to the installer week ness or lack of proper on propose .
So I Just did a test. i put the hinges on the BLAST to see if they look strong to you. First thing we tested was the over-tightening.. See first test. Perfect example of the wrong size tip. This test was performed on a Simply Brilliant 3/8" Clear tempered panel on the center hinge. We were unable to intentionally over tighten and pop glass. this is a deal breaker people. We as not only a company but a whole industry would be in so much trouble if it was even possible to do this. Could you imagine one of my installers calling and saying he just exploded another one at customers perfectly tile shower door opening??? Since modern machines cut these cutouts i will show you what I mean concerning
NOTICE HOW THE GLASS TILE DRILL-BIT IS NOT A SPEAR-POINT TYPE, AND HOW IT'S NOT A MASONRY BIT BUT AN ACTUAL DIAMOND CORE GLASS DRILL BIT SPECIFICALLY FOR DRILLING GLASS.
Powered by aturbosite.com online web site builderpace, then glazed into place with a non molding acid type silicone